Laundry Room Size Planning: What Fits, Clearances You Need, and How to Measure
Why measuring matters before you buy or renovate
Whether you are squeezing a washer and dryer into a hallway closet or planning a full laundry room renovation, the difference between a space that works and one that drives you crazy comes down to a few inches. Machines that technically fit but leave no room for loading, venting, or basic movement turn laundry day into a frustrating puzzle. Machines that cannot even make it through the doorway on delivery day turn it into an expensive one.
The good news is that a tape measure and about 20 minutes of careful planning can prevent both scenarios. With the average American household running seven to eight loads of laundry every week, your setup needs to be something you can live with comfortably for years, not a space that makes you dread every load. This guide walks you through exactly what to measure, what clearances your machines need to operate safely, and how to evaluate whether your space can handle side-by-side, stacked, or closet configurations before you commit to a purchase or a contractor.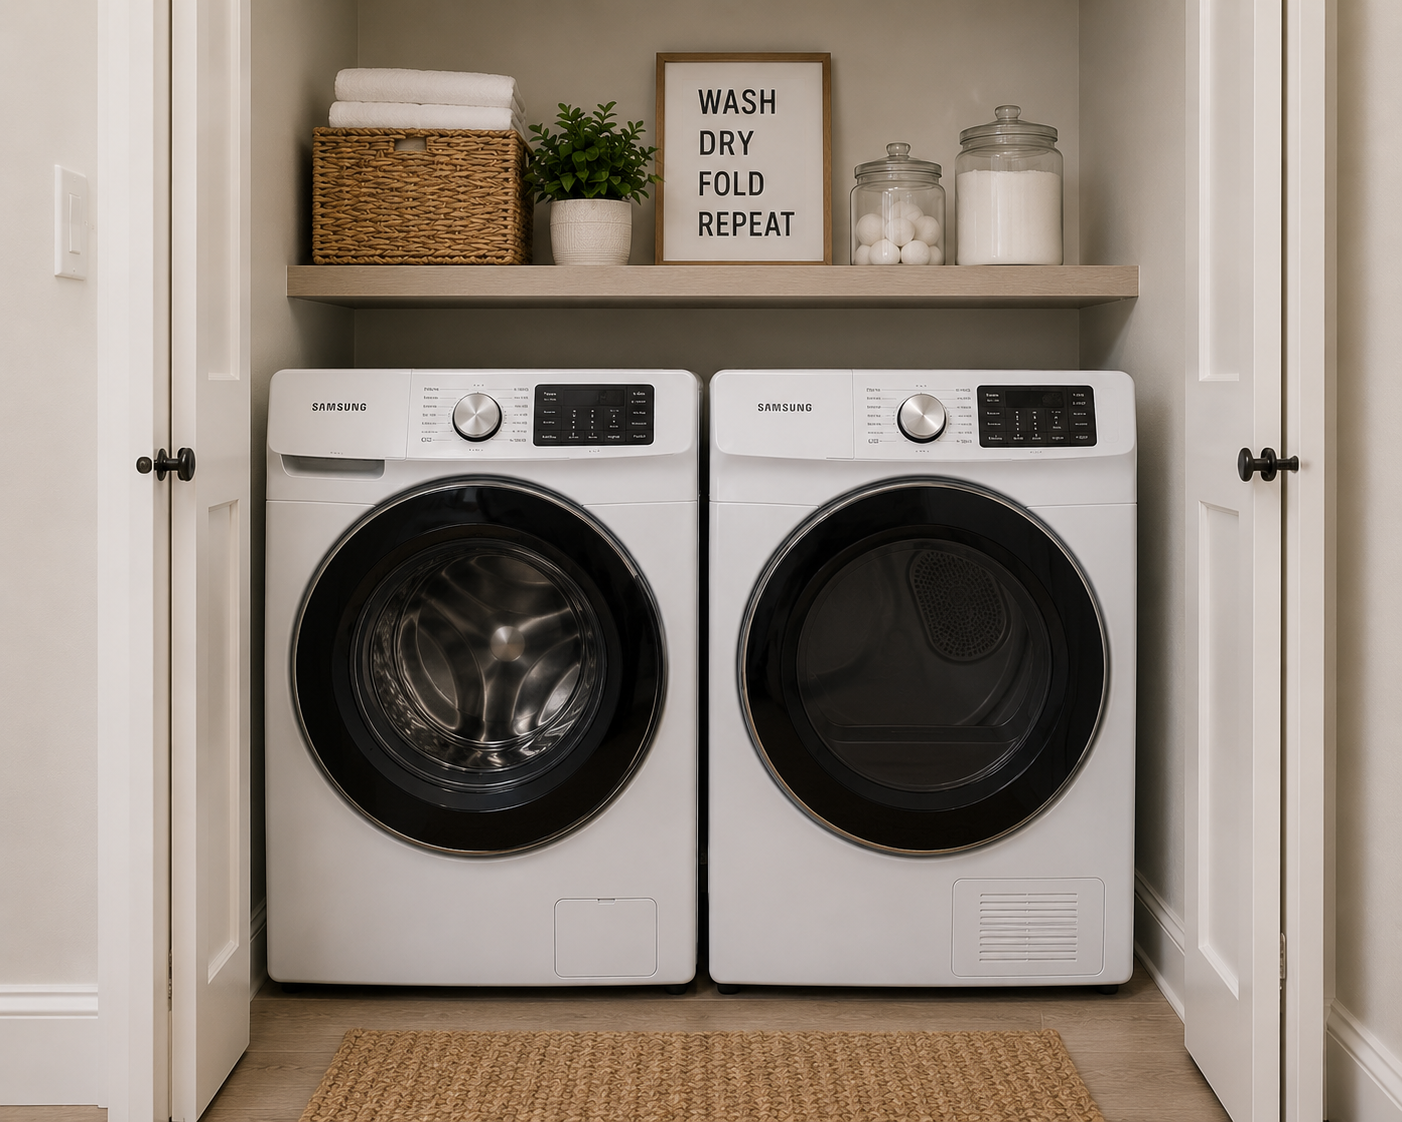
How to measure your laundry space step by step
Start with the three basics: width, depth, and height. Measure the width of the space from wall to wall (or from one obstruction to the other, like a door frame or cabinet edge). Write that number down. Then measure depth from the back wall to the front edge of the space, and finally measure height from the floor to the ceiling or to the bottom of any overhead shelf, cabinet, or countertop. These three numbers establish the maximum envelope your machines need to fit inside, but they are not your final usable dimensions. You still need to subtract clearances for airflow, hoses, venting, and door swings, which we will cover in the next section.
Before you stop measuring, there are two more critical dimensions most people forget. First, measure every doorway, hallway, and turn between your home’s entry and the laundry space. Standard washers and dryers are roughly 27 inches wide, and delivery teams need a few inches of clearance on each side to maneuver them through. A doorway should be at least 30 inches wide in clear opening to allow standard machines through, and building design experts recommend that 45 inches of hallway width is needed to navigate a 90-degree turn with a large appliance. If your hallway is narrower or there is a tight stairwell involved, measure those spots too.
Second, check that the floor in your laundry area is level. An uneven floor causes washers to vibrate excessively and can even cause them to “walk” across the room during a spin cycle. A simple bubble level placed in multiple directions will tell you if the floor slopes, and most machines have adjustable feet to compensate for minor unevenness.
Clearances every setup needs
The numbers on the spec sheet for your washer and dryer tell you how big the machines are, but they do not tell you how much total space those machines actually need to operate. Every installation requires clearance on all four sides plus above, and skipping any of these leads to performance problems, safety hazards, or premature wear on your equipment. Here is what to plan for:
-
Behind the machines (4 to 6 inches): This space accommodates water supply hoses, the drain hose, and the dryer vent duct. Crushing a dryer vent against the wall restricts airflow, forces the dryer to work harder, and creates a lint buildup that is a genuine fire risk. Water hoses also need room to curve gently rather than kink, since a kinked supply line can burst under pressure. If depth is extremely tight, recessed outlet boxes and periscope-style flat vent ducts can save an inch or two, but four inches remains the safe baseline.
-
On each side (1 inch minimum): Leave at least one inch between each machine and the nearest wall, and one inch between the washer and dryer if they sit side by side. This gap allows air to circulate and prevents vibration from transferring into walls, cabinets, or adjacent machines. In apartments and older buildings with thinner walls, that buffer combined with anti-vibration pads under the machine’s feet makes a noticeable difference in noise levels.
-
In front of front-loaders (48 inches): Once you account for the door swinging open, your body crouching to load and unload, and a laundry basket on the floor, four feet fills up quickly. This is the clearance people underestimate most often, and it is the one that makes daily use either comfortable or miserable.
-
Above top-load washers (16 to 18 inches): The lid needs to open fully without hitting a shelf, cabinet, or countertop. Some models have lids that extend 18 to 20 inches above the top of the machine at full open, so measure your specific model before installing anything overhead.
For anyone concerned about dryer vent safety and maintenance, getting the rear clearance right from the start makes ongoing care much easier. A vent that is accessible and runs a short, straight path to the exterior wall is safer and more efficient than one that is pinched behind a machine jammed against the wall.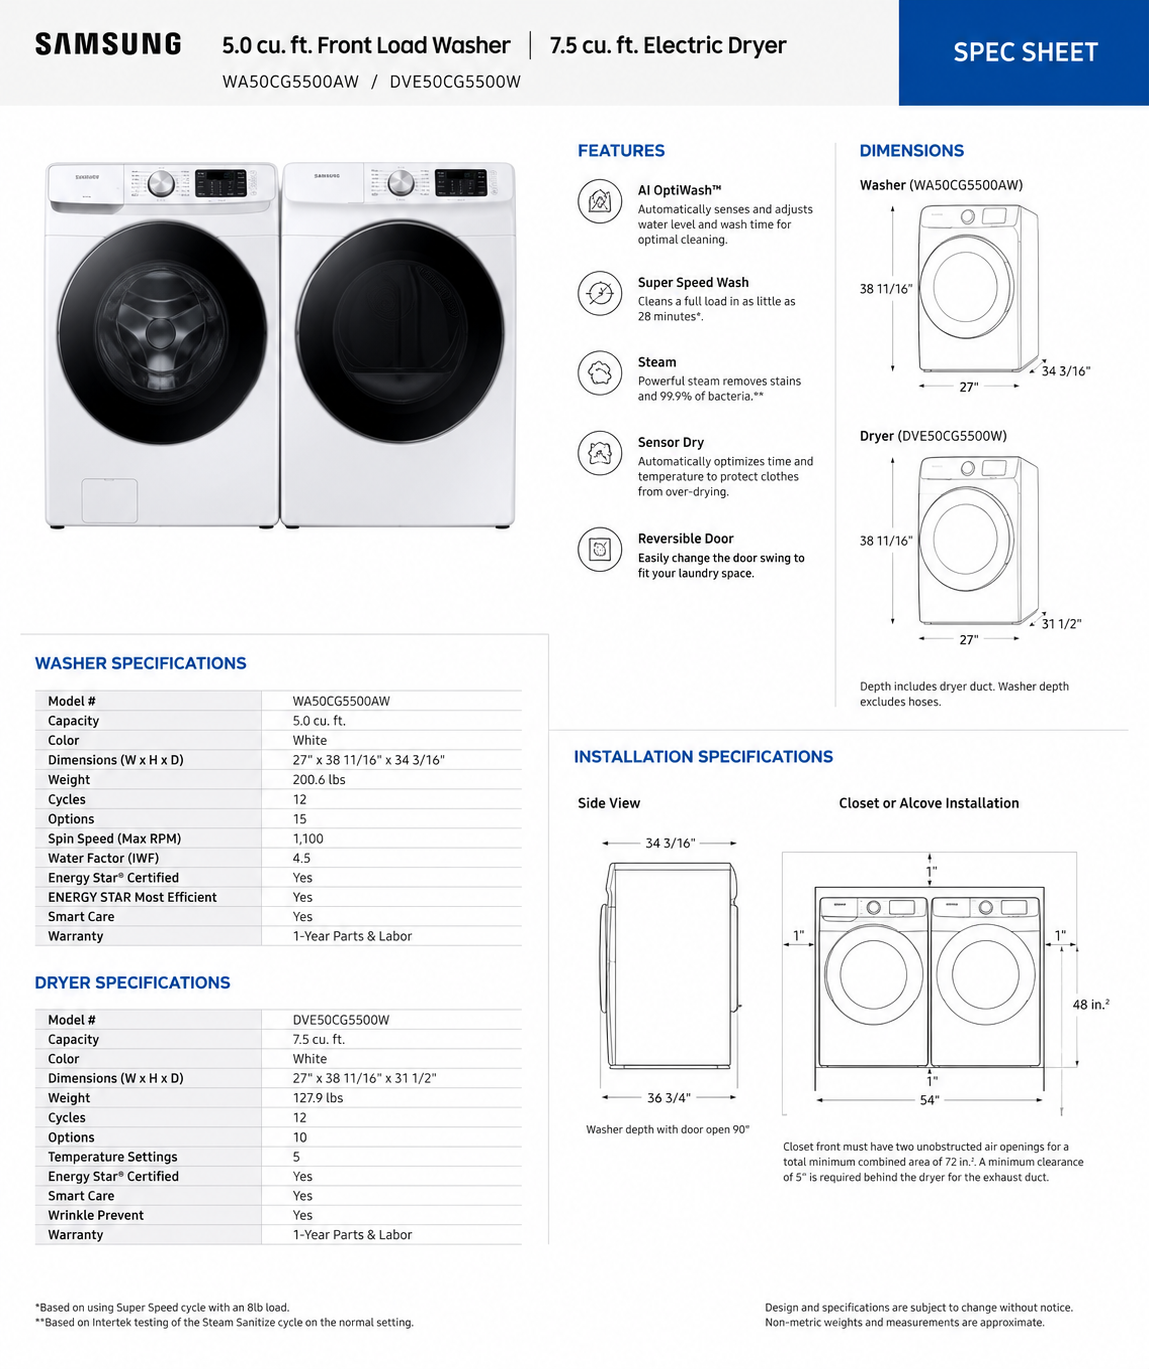
Front-load door swing vs. top-load lid clearance
The type of machine you choose changes your space requirements in ways that are easy to overlook until installation day. Front-load washers and dryers have doors that swing outward, and the direction of that swing matters. Most front-load washers are left-hinged, meaning the door opens to the left. Many dryers offer reversible doors, so you can set them to open in whichever direction makes the most sense for your layout. The ideal arrangement places the washer door swinging toward the dryer, so you can transfer wet clothes from one to the other in a single smooth motion without awkward reaching or turning.
If your laundry space is a narrow closet with a wall directly opposite the machines, measure the total depth you need: the machine depth, plus the rear clearance, plus the full arc of the open door, plus enough room for you to stand comfortably. For a standard front-load washer that is about 33 inches deep with a door that opens roughly 20 inches outward, you are looking at a total room depth of about 60 inches minimum once you add rear clearance and standing room. For top-load washers, the critical measurement is vertical rather than horizontal. Any overhead cabinet, shelf, or countertop needs to clear the lid arc completely, or you will be fighting with it every time you load a batch. This is one of the most common post-renovation regrets: cabinets installed 12 inches above a top-loader that block the lid from opening fully.
Stacked vs. side-by-side: what each layout requires
Side-by-side is the most common layout and requires the most floor space. Two standard machines sitting next to each other need approximately 57 to 60 inches of width (two 27-inch machines plus the three inches of side clearance), 36 to 40 inches of depth including rear clearance, and at least 48 inches of front clearance for door operation. For a dedicated laundry room, that translates to a minimum footprint of roughly five feet wide by seven to eight feet deep. That is a workable layout in most homes, and it leaves room along one wall for a counter, shelf, or storage cabinet. According to standard laundry room dimension guidelines, a small laundry room of about four by six feet to six by six feet can accommodate side-by-side machines with some basic storage, while a medium room of nine by six feet or larger adds room for a folding surface and utility sink.
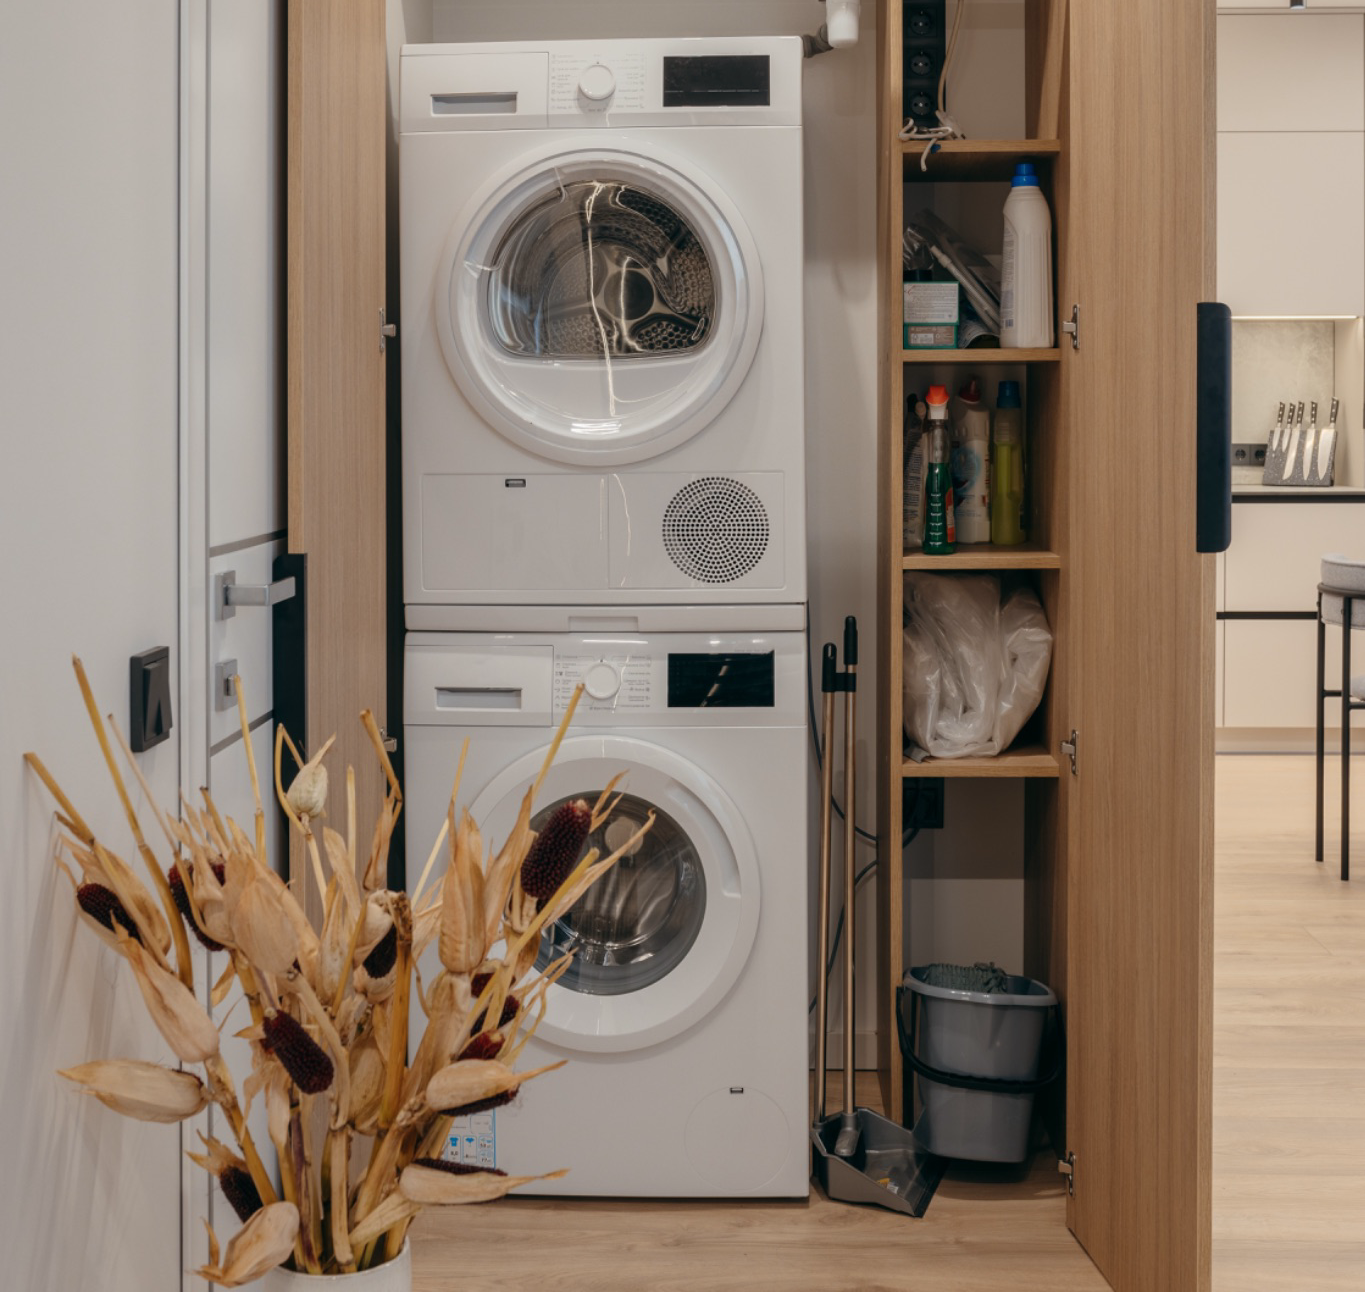
Stacked configurations trade width for height. A stacked washer and dryer typically occupies about 27 inches of width and 30 to 34 inches of depth, but stands 74 to 80 inches tall. That means your ceiling needs to be at least 80 inches from the floor to accommodate the stack with a small buffer at the top, and the closet or alcove needs to be at least 30 inches wide inside to allow for side clearances. Stacking is the go-to solution for apartments, condos, hallway closets, and any situation where floor space is precious. The trade-off is ergonomics: the dryer sits on top with its controls and door opening at roughly five to six feet high, which can be difficult for shorter users or anyone with mobility limitations. Stacked units also must be front-loading, since you cannot stack a top-load washer.
If you are considering a stacked setup in a closet, remember two things that are easy to miss. The closet door needs to be wide enough for the machines to pass through on delivery day. And the closet itself needs ventilation, either through louvered doors, grilles at the top and bottom, or an open back wall. A tightly sealed closet traps heat and moisture from the dryer, which degrades performance and can lead to mold growth over time.
 Hookups and vent planning basics
Before you fall in love with a particular layout, verify where your utility connections actually are. Your washer needs a hot and cold water supply line, a drain (either a standpipe or a utility sink), and a standard 120-volt electrical outlet. Your dryer needs either a 240-volt outlet for electric models or a gas line for gas models, plus an exhaust vent to the exterior of the building unless you choose a ventless or heat pump dryer. Moving any of these connections is possible but adds significant cost to a renovation, so most people plan their machine placement around existing hookups rather than the other way around.
Vent routing deserves special attention because it directly impacts performance and safety. A dryer vent should run as short and straight as possible to the outside wall. Every extra foot of duct length and every 90-degree elbow reduces airflow and increases the risk of lint accumulation. Building codes in most areas cap total vent length at 25 feet, with deductions for each bend. If your laundry room sits in the interior of your home with no easy path to an exterior wall, a ventless heat pump dryer eliminates the vent requirement entirely, though these models typically cost more upfront and have longer drying times. For anyone evaluating gas vs. electric dryers, the available connections in your space often make the decision for you.
Noise and vibration in apartments and older buildings
In a standalone house with a first-floor or basement laundry room, noise is rarely a deal-breaker. In a Chicago apartment, a condo with shared walls, or an older building with wood-frame floors, it can be a real problem. Washers generate the most vibration during the spin cycle, and that vibration travels through floors, walls, and ceilings to neighboring units. The single most effective step is ensuring the machine is perfectly level on a solid, flat surface. Adjustable feet on the machine handle minor unevenness, but if the floor has significant flex (common in older wood-frame buildings), adding a thick rubber anti-vibration mat under each machine dampens the transmission noticeably.
Beyond leveling, the clearance gaps we discussed earlier play a direct role in noise reduction. Machines pressed against walls transmit vibration directly into the building structure. That one-inch side gap and the four-to-six-inch rear gap create a buffer that keeps the machine from drumming against hard surfaces. If your laundry area shares a wall with a bedroom or living space, adding insulation to the shared wall during renovation is worth the investment. And if you are choosing between machine types, front-load washers generally produce less vibration than top-loaders because their drum orientation distributes weight more evenly during the spin cycle.
Storage planning that does not block airflow or access
Once the machines are placed and the clearances are accounted for, the remaining space is yours to organize. Shelves above the machines are the most common storage solution, but they need to be positioned thoughtfully. In a front-load setup, overhead shelves or cabinets can start about 12 to 15 inches above the machine tops, which puts them at a reachable height while leaving room for detergent dispensers to open. In a top-load setup, those shelves need to be significantly higher to clear the open lid. Wall-mounted shelving is generally preferable to deep overhead cabinets in small laundry spaces because it keeps the room feeling open and avoids blocking airflow around the machines.
The key rule for storage in a laundry room is that nothing should block your ability to pull the machines away from the wall for service, access the water shutoff valves in an emergency, or maintain the airflow clearances on any side. Freestanding shelving units, rolling carts, and wall-mounted racks are all solid options that can be moved if you need to troubleshoot a leak or replace a hose. Built-in cabinetry looks polished and adds resale value, but make sure it does not create a permanent obstacle between you and the connections behind your machines. A practical approach is to leave the space directly behind and beside the machines clear, and concentrate your storage on adjacent walls, above the machines with proper clearance, or on the opposite wall if the room is deep enough to support it.
When the space just does not work
Sometimes the honest answer to “will this fit?” is no. Maybe the closet is three inches too narrow for the machines you want. Maybe the hallway has a turn that delivery cannot navigate. Maybe you are in a rental where the landlord is not going to approve new hookups. Maybe you could technically cram machines into the space, but using them would be so uncomfortable that laundry becomes an even bigger chore than it already is. When your setup adds friction to every single load across an entire week, the cumulative frustration is real.
For Chicagoans dealing with tight apartments, older buildings, or shared laundry rooms that never seem available when you need them, self-service laundry with high-capacity commercial machines handles everything from daily clothes to bulky comforters without the space constraints of a home setup. And if the real problem is not space but time, a professional wash-and-fold service takes the entire process off your hands. Your clothes come back clean, folded, and ready to put away, with no measuring, no clearances, and no wrestling a dryer through a narrow doorway. Sometimes the smartest space plan is recognizing when the space you have works better without machines in it at all.